Dissecting my Ruby Project Skeleton
My project skeleton is a base starting point for simple, vanilla Ruby creations. I examine how the basic parts work together for fellow Ruby newbies.
As I wrote on this very site, I recently got my first real taste of Ruby's server-side power. It's to the point I'm missing my bedtime due to Ruby tinkering, not reading manga or listening to "Wait Wait Don't Tell Me" on NPR.
My life is so thrilling, I know.
As part of this growing love for Ruby, I've been building a Ruby project skeleton, a ready-to-go starting point for vanilla Ruby projects. As I made it, I learned more about the different roles of Ruby files and folders I've often seen but never understood. For example, the bin folder isn't for disposing of code no one wants. The spec folder also doesn't contain specters or ghosts, contrary to what a coworker told me. Knowing this now won't get me back all those sleepless nights, sadly.
Anyway, this post is an overview of my project skeleton's key parts and how they work together. This post is partly a hopeful nudge to other programmers, especially those more on the front-end, who could potentially fall in love with Ruby too. If you're like me, someone who wants to use Ruby more but has no knowledge of how simple Ruby projects work, this post is for you.
If you're also like me, and want to use Ruby to scrape a website for anime artwork that emails itself to yourself every morning, this post is especially useful for you. This has has become my go-to side project for learning more of a back-end language, and I'll reference it a lot for some clarity and examples.
With that, let's start the dissection!
Gemfile and Gemfile.lock #
The first part of my Ruby skeleton, funnily enough, is about organizing other peoples' code. Like JavaScript and everyone's favorite node_modules folder, Ruby uses the Gemfile to organize third-party Ruby dependencies called "gems." Gems have been written for many useful tasks like complex logic, running tests, scraping the web, sending mail, and more. I actually use several gems like this for my newsletter app!
Adding gems to the project is incredibly easy:
- Set up the Gemfile to use
https://rubygems.orgas the source for downloading gems. This makes sure I only download official gems by the Ruby community. - List the gems needed by name. Gems can be specified by your environment (local, production, testing, etc), but isn't needed with a small skeleton like this.
- Install them by running 'bundle install' in the command line. If you don't have bundler, add it with
gem install bundler. - The
Gemfile.lockis generated automatically, keeping track of all the gem versions and dependencies. Never edit this file directly!
Here's what my newsletter's Gemfile looks like with all its gems:
source "https://rubygems.org" do
  gem 'rspec'      # For running tests
  gem 'nokogiri'   # For scraping web data
  gem 'dotenv'     # For using environmental variables
  gem 'mail'       # For sending emails
end
My skeleton project only has rspec at the start, an extremely popular Ruby testing framework. While Ruby has testing tools built in, I've found I prefer rspec as a robust, descriptive testing setup.
Each gem can be easily referenced and used in other files, which I'll explain in the next section.
lib/ #
With the code other people have written all set, I can get to my favorite part: my own Ruby code!
The lib/ folder is the most important to me, as it holds the actual project's functionality. All the classes, modules, routes, models, and whatever else it needs are here.
My newsletter project is relatively small, so the lib/ folder there only has four files. I won't go into the details of how they work, since that's an entirely different blog post. But I will share their basic roles and how they need each other:
tags_module.rbis a module for organizing the tags and parameters for image searches.wallpaper_url_query.rbis a class that gets the actual images. It uses the tags module to visit specific search pages on an anime art website, and usesnokogirito scrape them for image URLs.wallpaper_email_presenter.rbcreates multiple object instances fromwallpaper_url_query.rband makes them presentable (get it) with basic HTML and CSS.email_sender.rbtakes the markup fromwallpaper_email_presenter.rband uses thedotenvandmailgems to send an email.
More complex Ruby apps like those in Rails can have folders with dozens of classes, all referencing multiple ones in a complex, non-linear way. But this is a better starting project since it's, as the above makes obvious, a more simple and linear app.
Pulling in code from other files and gems took me a while to figure out, so here's a shortcut for you. At the top of a Ruby file:
- If you need to use a gem, use
requireand the gem's name. - If you need to use a file from your project like the
lib/folder, userequire_relativewith the relative path to that file.
For example, my newsletter project's wallpaper_url_query.rb file uses two gems other people made, and the tags module I wrote in the same project. I require them all at the start of the file like so:
require 'open-uri'
require 'nokogiri'
require_relative 'tags_module.rb'

# To use a file outside lib/, I'd use:
# require_relative '../other_folder/other_file.rb'

class WallpaperUrlQuery

    # ...The actual Ruby goes here

end
As anyone who used Ruby on Rails will tell you, there's ways around having to require_relative all your own files. But that's not the case in a vanilla Ruby skeleton like this. As a colleague of mine pointed out, being explicit about what dependencies each file has may take a few extra lines, but it makes each class's needs clear from the start.
So I have the gems, and I have my app code that make and send the actual newsletter. What's next? Making sure it all works! That's where the spec/ folder in my skeleton comes in.
spec/ #
As someone from mostly the front-end, my idea of "tests" has been limited to:
- Does the CSS work on my browser? If so, try again.
- Does the JavaScript throw any console errors? If so, try again.
- Does it make the designer complain? If so, grab a drink.
- Does it break on IE11? If so, cry.
But unlike CSS and JavaScript, Ruby is more thorough about testing. The test/unit is a testing gem included with Ruby, so there's little excuse not to test. This default library has its tests in the test folder, but since I prefer RSpec, my tests go in the spec folder. All good apps will have tests, which is why my skeleton always has a test folder.
The nitty-gritty of writing tests is another post entirely, but I will share a few rules of thumb I've learned in my first year or two of test writing.
- Every file in
lib/will ideally its own file inspec/. It's the same name with_specat the end, and usesrequire_relativeto get the related file. - Tests shouldn't repeat the logic or process used in the app. They should check the class for the right results or effects.
- If possible, write the tests first. Tests are a high priority for functioning code that doesn't inexplicably crap out on me later.
Here's a quick example from one of my test files, which makes sure my queries to the artwork site return a correct image URL. Even if you've never used RSpec, its readable and explicit syntax help anyone understand how my tests work.
require_relative '../lib/wallpaper_url_query.rb'

describe WallpaperUrlQuery do
  let(:query) { WallpaperUrlQuery.new() }

  it 'should return an image url' do
    image = query.random_image

    expect(image).to be_a(String)
    expect(image).to include(WallpaperUrlQuery::BASE_URL)
    expect(image).to include('.jpg').or include('.png')
  end

  # ...more tests here
end
As you can guess, I'm not recreating the query's functionality at all. However the query works, I just want to be sure the image url it gives me:
- Is the right format, a string
- Contains the url of the site hosting it
- Has an image extension
These seem to be the biggest parts of the app skeleton - the gems, the functionality, and the tests. But there's a final question that I'd had many times when first working with Ruby code - how do I execute it? It's not like the front-end, where I just need to open it all in a web browser.
That's where the next two parts of the skeleton come in. They make and organize actual tasks for executing the code. I'm still working out the exact roles of these two types of execution myself, so I'm going more off my own rules of them for when to include them so far.
Rakefile #
The Rakefile is a Ruby file where I keep my "non-production" tasks, which start making actual use of my code so far! I've stuck to using the Rakefile for any of the following:
- Code that changes the repo's code, such as changing data to different forms
- Smaller tasks that can be used as part of larger production tasks
- Any other thing I only want to code, or test, locally
An example is the one Rakefile task I have in my newsletter app. The entire file, with this task included, is just this:
require_relative 'lib/wallpaper_email_presenter.rb'
desc "Run a test of the newsletter template"
task :template do
FileUtils.mkdir_p('demo') unless Dir.exists?('demo')
File.delete 'demo/index.html' if File.exists?('demo/index.html')
File.write 'demo/index.html', WallpaperEmailPresenter.new().full_view
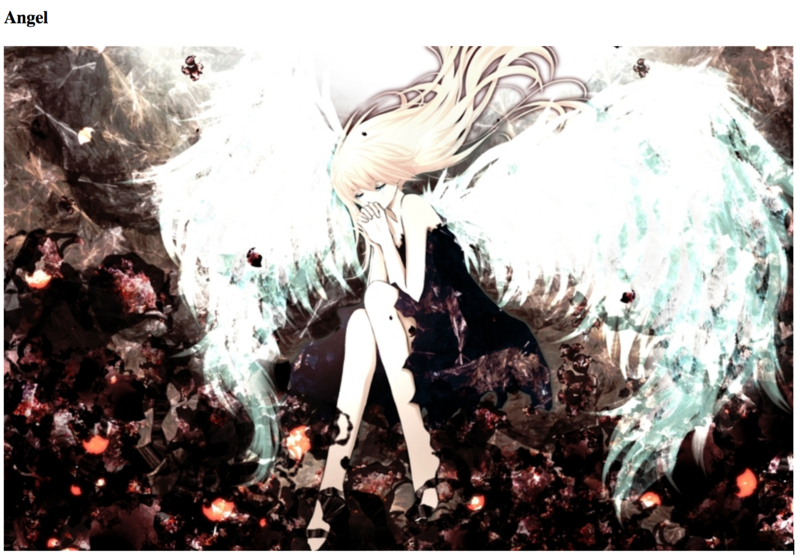
endThis creates a "demo" of how the newsletter will look by saving an example newsletter as a webpage. I can pop it open in a browser and see what images my query class found. Now I can run rake template and test my newsletter without sending an email. I ran it just now (literally after that last sentence) and got this artwork from my "angel" query.
This isn't something I'd use in production, since this is an indirect way to test it out. That's why I keep it here, and can run it with other potential Rake tests with rake <name> on the command line.
bin/ #
Bin is short for "binary executables" (I'm 95% sure that's right). These are the scripts I actually use for production. They do the big things for Ruby apps like run the web server, run the tests, send out lots of emails, or whatever else production-level Ruby apps do. I'm still far from that level, so much of the bin/ folder is still a mystery to me.
I do know, however, that bin files aren't limited to Ruby like Rake tasks are. They can be set to different language environments based on what's needed. This gives them more power and flexibility, which is important for running whatever key tasks are needed.
For example, my newsletter project has two simple bin files in different environments. The first, test, uses bash and runs the RSpec tests.
#!/usr/bin/env bash

rspec
The second, send, is in Ruby. It uses the app's code to send the actual email.
#!/usr/bin/env ruby

require_relative '../lib/email_sender.rb'
EmailSender.new().send_email
You may have noticed the file names have no saved extension. That's why the environment is specified in the first line. It also means I need to run chmod u+x bin/<file_name> to make the files executable. But once that's done, I can run bin/test for the tests and bin/send for sending the emails out.
So yes, I finally arrived at the point where I can upload this code to a server and schedule it to run bin/send every morning. All by using these basic parts of my Ruby skeleton!
README #
Lastly is everyone's favorite file, the README! My skeleton's README is a basic reminder of setting it up and running tasks, so it's worth noting.
bundle install             # Install gems
rake custom                # Run custom tasks
bin/test                   # Run bin tasks, such as tests
chmod u+x bin/<file_name>  # Make a bin file executable
There's a few more folders in my skeleton I haven't noted, like doc/ and data. But with my current experience and focus I'm unlikely to touch them anytime soon, so I'll save them for another day.
Conclusion #
The dissection is now complete, and you now know the basic setup for all my future vanilla Ruby projects! You can find the entire Ruby skeleton on Github to poke and play around with. You can also see the Ruby newsletter project I pulled examples from to see how the skeleton translates to something real (even at a beginner level).
Even though you could use my skeleton to start your own Ruby projects, I'd advise against that. As I've learned from Zed Shaw's "Learn Ruby the Hard Way" book, making something from scratch through research, trial, error, and amphetamine-fueled nights is how the knowledge sticks. Plus I'm still learning myself - there could be things I flat-out got wrong or could improve on greatly (if you spot anything like this, comment with them below!). So don't take my skeleton project as the gospel truth.
This skeleton, as glad as I am I have it, is still another small step in learning Ruby. I still have books to take notes on, tutorials to try out, and I need time to play around more with the ever-lovely Ruby on Rails. But as I wrote earlier, this was my second real nudge into the power and joy built into Ruby. I went from saving time changing data to building an actual project with a purpose, custom logic, and tests. I plan to use a lot more of it for similar projects later on.
If I'm really lucky, I can help inspire a few other programmers to do the same. So if you're a front-end programmer looking to play with the back-end, give your own Ruby skeleton a shot!
- Next Post: The Testing Introduction I Wish I Had
- Previous Post: My First Taste of Ruby Task Automation in 22 Lines